


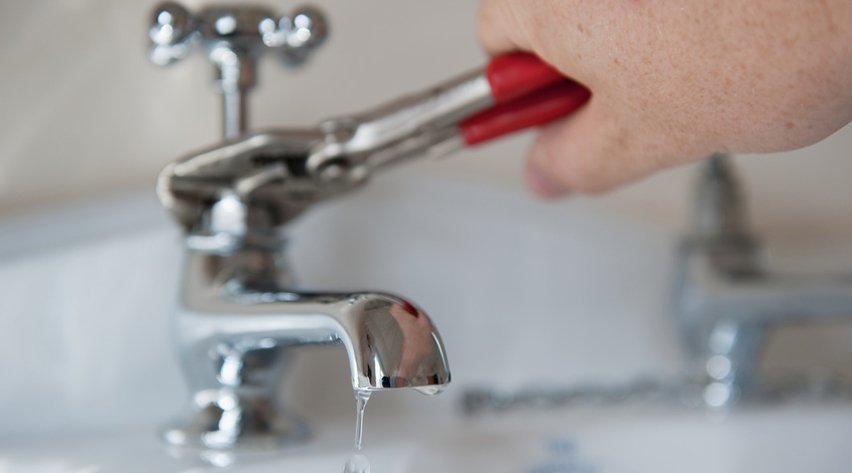
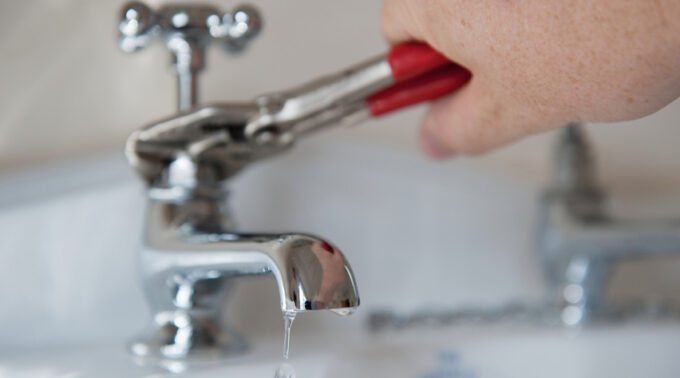
Drip. Drip. Drip. Few household sounds are more annoying than a faucet that keeps leaking after you turn it off. Besides disturbing your peace, a dripping tap can waste water and may point to a worn part that needs attention.
The good news is that you do not always need a plumber or a new faucet. In many cases, replacing a worn washer, seal, or cartridge can solve the problem. However, the correct repair depends on the faucet design and where the water escapes.
If you want to learn how to stop a dripping faucet, this guide will walk you through the most common causes, the tools you need, and the steps to make a safe repair. You will also learn when a DIY fix is enough and when professional help is the smarter choice.
Why Is Your Faucet Dripping?
Before you start taking anything apart, identify the source of the leak. A faucet may drip from the spout, leak around the handle, or release water beneath the sink. Each problem can have a different cause.
1. Worn washers and seals
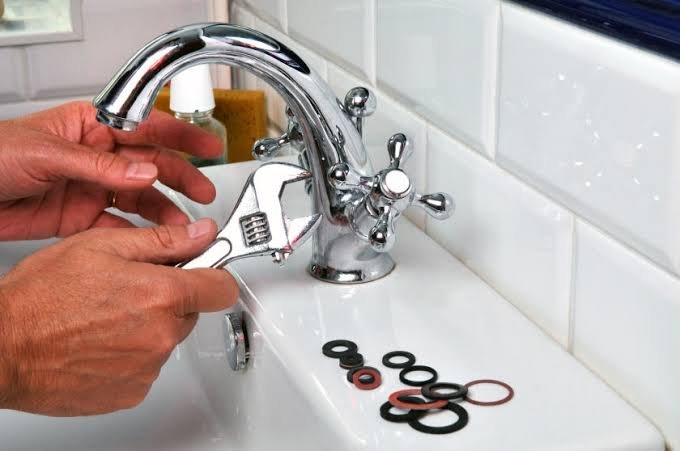
Traditional faucets often use rubber washers to create a tight seal when the water is turned off. Over time, these washers may become hard, cracked, or misshapen.
When the washer no longer seals properly, water can continue escaping through the spout. Replacing the damaged washer may solve the problem.
2. A damaged cartridge
Many modern faucets use a cartridge to control water flow and temperature. If the cartridge becomes worn or damaged, it may allow water to pass through even when the handle is closed.
A cartridge replacement is often possible, but you must choose the correct part for your faucet model.
3. Mineral buildup
Hard water can leave mineral deposits inside faucet components. These deposits may stop moving parts from closing properly or cause seals to wear unevenly.
Cleaning removable parts may help when buildup is the main problem. However, badly damaged components usually need replacement.
4. A damaged valve seat
The valve seat is the surface against which a washer seals. Corrosion or wear can prevent a new washer from forming a tight seal.
If a faucet continues dripping after you replace the washer, the valve seat or another internal component may need inspection.
5. Loose connections
If water appears around the handle or beneath the sink rather than from the spout, the problem may involve an O-ring, supply hose, shutoff valve, or connection.
Do not assume every leak comes from the faucet itself. First, dry the area and watch where the water appears.
Tools You Need to Stop a Dripping Faucet
Most basic faucet repairs require only a few tools. Preparing them before you start can make the job easier and reduce the chance of damaging the fixture.
You may need:
- Adjustable wrench
- Screwdrivers
- Hex key, if your handle uses a set screw
- Replacement washer, seal, or cartridge
- Soft cloth or towel
- Small container for screws and parts
- Flashlight
- Manufacturer’s instructions
You may also need a suitable cleaning product if mineral deposits have built up on removable components.
Helpful tip: Take a photo of the faucet before removing any parts. Photograph each stage of disassembly, too. These pictures can help you remember how the components fit together.
Do not buy a replacement part based only on its appearance. Similar faucets can use different cartridges and washers, so check the model number whenever possible.
How to Stop a Dripping Faucet Step by Step
The following steps cover a typical faucet repair. Your exact procedure may vary depending on whether the faucet uses a compression valve, cartridge, or ceramic-disc assembly.
Step 1: Turn off the water supply
Look beneath the sink for the hot and cold shutoff valves. Turn the appropriate valves clockwise gently until they close.
If the valves are stuck, badly corroded, or leaking, do not force them. Contact a plumber instead. If no working local shutoff valves are available, you may need to shut off the main water supply.
Next, open the faucet to release the remaining water pressure. Place a towel in the sink to protect its surface and prevent small screws from falling into the drain.
Step 2: Identify your faucet type
Look at the handles and the manufacturer’s information.
Common designs include:
- Single-handle faucets: One handle controls flow and temperature.
- Two-handle faucets: Separate handles control hot and cold water.
- Compression faucets: Often use rubber washers that press against a valve seat.
- Cartridge faucets: Use a replaceable cartridge to control water flow.
- Ceramic-disc faucets: Use ceramic discs and seals to regulate water.
This step matters because the repair method depends on the internal design.
Step 3: Remove the handle
Look for a decorative cap covering a screw. Some faucets have a small set screw on the side or underside of the handle.
Remove the screw using the correct tool, then lift the handle carefully. If it will not come off, avoid pulling too hard because older handles may crack.
A handle puller may be needed for a stubborn fixture. Do not use excessive force on the faucet body.
Step 4: Inspect the internal parts
Depending on the design, you may see a valve stem, cartridge, washer, or retaining clip.
Remove the relevant component according to the manufacturer’s instructions. Keep small parts together and take another photo if necessary.
Look for:
- Cracked or flattened rubber washers
- Damaged O-rings
- Worn cartridges
- Corrosion
- Mineral deposits
- Broken plastic components
If a part looks damaged, compare it with a replacement designed for the same faucet model.
Step 5: Replace the faulty part
Remove the worn washer or seal and install the correct replacement. If the faucet uses a damaged cartridge, replace it according to the manufacturer’s directions.
Make sure each part sits in the correct position. A washer that is crooked or a cartridge that is not fully seated may cause the leak to continue.
Avoid using excessive force or random sealants. Tighten fittings securely without overtightening them.
Step 6: Reassemble the faucet
Return the internal components to their original positions. Reinstall retaining clips, nuts, and the handle.
Check that all screws are secure and that no parts are left over. Before restoring the water supply, make sure the faucet handle is in the closed position.
Step 7: Restore the water and test the repair
Slowly reopen the shutoff valves. Turn the faucet on briefly, then close it again.
Check the spout, handles, faucet base, and connections beneath the sink. Wait a few minutes and inspect the area again.
If the dripping has stopped and no new leaks appear, the repair is likely successful. If the water continues dripping, the valve seat may be damaged, the replacement part may be incorrect, or another component may be faulty.
How to Fix a Dripping Faucet With Two Handles
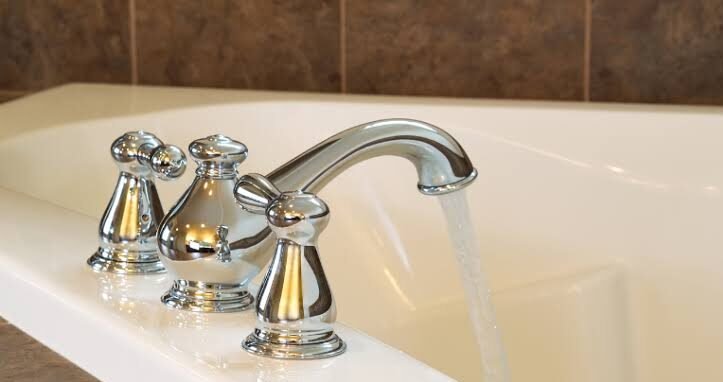
A two-handle faucet has separate controls for hot and cold water. If the spout continues dripping after both handles are closed, one side or both sides may have a worn washer, cartridge, or seal.
If you are researching how to fix a dripping faucet with two handles, begin by shutting off both supply valves. Then remove the handle on the suspected side and inspect its internal parts.
For a traditional compression faucet, replacing the worn rubber washer may be enough. For a modern cartridge faucet, you may need to replace the cartridge instead.
If a new washer does not solve the problem, inspect the valve seat and stem. Both sides can wear over time, so check the other handle if the leak continues.
Important: Do not force a stiff handle to stop the dripping. Extra pressure can damage the internal components and make the repair more expensive.
How to Fix Dripping Faucet Problems That Keep Returning
Sometimes a faucet starts dripping again soon after a repair. This usually means the original problem has not been fully resolved.
Check the replacement part
A washer or cartridge that is the wrong size may not create a proper seal. Confirm the faucet brand and model before purchasing another part.
Inspect the valve seat
A damaged or corroded valve seat can prevent even a new washer from sealing properly. Some valve seats can be serviced with a suitable tool, while others require professional repair.
Look for mineral deposits
Mineral buildup may interfere with moving parts. Clean removable components only with methods suitable for the faucet material and manufacturer instructions.
Check for other leaks
If water appears beneath the sink, the problem may involve a supply hose or shutoff valve rather than the faucet’s internal mechanism.
When several repairs fail, it may be more efficient to have a plumber diagnose the fixture than to keep replacing parts without knowing the cause.
How Much Water Can a Dripping Faucet Waste?
The amount of water wasted depends on the leak rate. A few drops occasionally may have little effect on your bill, while continuous dripping can add up over time.
For example, assume a faucet releases one drop per second, with each drop measuring approximately 0.25 milliliters.
The estimated water waste would be:
- Per hour: 0.9 liters
- Per day: 21.6 liters
- Per 30-day month: 648 liters
- Per year: About 7,884 liters
These are estimates because drop sizes and leak rates vary. A faster leak may waste substantially more water.
How much does a dripping faucet cost per month?
To estimate the monthly cost, divide the liters wasted by 1,000 to convert the amount into cubic meters. Then multiply the result by your local water and wastewater rate.
For example, if the faucet wastes 648 liters in a month and your combined variable rate is €4 per cubic meter, the estimated cost is about €2.59.
Your actual bill may differ because of local prices, fixed charges, and the amount of water used.
Although a slow leak may cost only a small amount each month, a leaking connection beneath the sink can also damage cabinets and flooring. Repairing the problem early can prevent these additional expenses.
Can a Dripping Faucet Prevent Pipes From Freezing?
During certain freezing conditions, allowing a small flow of water may help reduce the risk of ice blocking vulnerable pipes.
If you are wondering how does dripping faucet prevent freezing, the basic idea is that moving water may freeze less readily under some conditions, while an open outlet may help relieve pressure in certain situations.
However, dripping water is not a guarantee against frozen pipes. Insulating exposed plumbing, sealing cold-air gaps, and maintaining suitable indoor temperatures are important preventive steps.
Follow local utility or plumbing guidance during severe cold. Do not leave a faucet dripping indefinitely when it is not needed.
When Should You Call a Plumber?
Many faucet leaks can be fixed with basic tools, but some problems require professional help.
Contact a plumber if:
- The shutoff valves are stuck, damaged, or leaking.
- Water continues dripping after you replace the correct component.
- The faucet body is cracked or badly corroded.
- Water is leaking inside a wall or beneath the floor.
- You cannot remove the handle or cartridge safely.
- You suspect a frozen or burst pipe.
A plumber can identify the source of the leak and determine whether repairing or replacing the faucet is the better option.
If you rent your home, contact your landlord or property manager before carrying out repairs that may affect the plumbing.
How to Prevent Your Faucet From Dripping Again
Once the leak is repaired, a few simple habits can help prevent future problems.
Avoid overtightening the handles. Turn them off normally instead of forcing them beyond their stopping point.
Clean the faucet correctly. Follow the manufacturer’s instructions and avoid harsh cleaners that could damage the finish or seals.
Check beneath the sink regularly. Look for damp cabinet panels, corrosion, or moisture around supply connections.
Replace worn parts promptly. Do not wait for a slow drip to become a steady stream.
Keep the model details. Record the faucet brand and model number so you can find compatible parts when needed.
These steps take little time and may help you spot a problem before it becomes a larger repair.
Conclusion: Stop the Drip Before It Gets Worse
Learning how to stop a dripping faucet starts with finding the source of the leak. Worn washers, damaged cartridges, mineral buildup, and faulty connections are common causes, but each requires a slightly different repair.
Turn off the water supply before removing parts, use compatible replacements, and test the faucet carefully after reassembly. If the leak continues or you discover damaged plumbing, contact a qualified plumber.
A small repair can reduce water waste, protect your sink cabinet, and restore peace and quiet to your home. Most importantly, acting early is usually easier than dealing with a leak that has been ignored for months.
Frequently Asked Questions
1. Why does my faucet drip after I turn it off?
A worn washer, damaged cartridge, faulty seal, or corroded valve seat may allow water to continue passing through the faucet. The exact cause depends on the faucet design.
2. Can I stop a dripping faucet without replacing it?
Sometimes. Cleaning suitable removable parts or correcting a loose connection may help. However, worn washers, damaged cartridges, and cracked components generally need replacement.
3. Is a dripping faucet expensive to fix?
The cost depends on the faucet type, the replacement part, and whether you do the work yourself or hire a plumber. A simple washer replacement is often less expensive than replacing the entire fixture.
4. Should I replace both sides of a two-handle faucet?
Not always. Replace the faulty component first, but inspect both sides for wear. If both washers are old or damaged, replacing both may be practical.
5. When should I replace the whole faucet?
Replacement may be the better choice if the faucet body is cracked, corrosion is severe, parts are unavailable, or repeated repairs are no longer practical.






Leave a comment